
The Cheapest Sensor Can Be the Most Expensive
· David Hanning
Diagnostic Truth Series · Part 7
A few weeks ago I was speaking with a DSO’s top technical team, and they told me about their daily struggle keeping their 10- to 12-year-old sensors running across the fleet.
Those sensors have replaceable cables — which they were replacing constantly, a process that’s notoriously tricky to get seated correctly — and separate interface boxes that no one manufactures or repairs anymore. When one of those boxes failed, the only fix left was soldering components back onto the board by hand just to keep it alive. This group runs about 250 sensors across their locations, and the cables fail constantly too, so they were buying replacements at around $500 apiece at DSO wholesale and swapping them out themselves. Here’s the part most people don’t realize: those cables are extraordinarily sensitive. If the replacement isn’t seated absolutely perfectly, the sensor doesn’t just work a little worse — it starts throwing intermittent faults. Auto-triggers that fire on their own or won’t fire at all. Captures that never return an image. So a “successful” repair often wasn’t: sometimes it took two or three attempts to get one sensor talking cleanly to the computer again. A whole technical team, running a permanent triage unit for a fleet of sensors that were supposed to save the practice money.
I stood there and ran the math in my head, and it wasn’t pretty. So I told their technical group exactly what I’m doing right now: I said I was going to write this up — for their CFO and their CEO — because the people who sign the checks almost never see this room. They see the purchase price on the original quote. They don’t see three salaries, $500 wires, and soldering irons keeping a decade-old fleet on life support. On that quote, the purchase price is the biggest number they read. In real life, it’s the smallest number that matters.
That’s what “cost of ownership” really means, and it has two halves. The first is the one that office was living every day: the expense of keeping the sensors going — the repairs, the wires, the labor, the downtime. The second is quieter and even more expensive: what you’re seeing, or not seeing, in the image itself. A sensor that’s cheap to buy and clear as mud costs you diagnoses, treatment, and patient trust every day it’s in the operatory.
Put those two halves together and you get the reveal I promised that DSO — the one this whole post is built around: the least expensive sensor can be the most expensive one you own, and the most expensive sensor can be the best value on the shelf.
Let me walk you through the math the way I walked them through it.
What “Five-Year Sensor Life” Actually Means
Ask around and you’ll hear the same figure from most sensor manufacturers: expected service life, about five years. It’s worth understanding what that number is and what it isn’t.
It is not a warranty, and it is not a promise your sensor will drop dead at the 60-month mark. It’s closer to a survival estimate. Across a large population of sensors, by roughly the five-year point, most units have either failed, degraded, or been replaced. Some die at year two. Some soldier on to year eight. Five years is the shorthand the industry uses for “plan on replacing it around then.”
That matters for one simple reason: if you’re honest about the lifespan, then every sensor purchase is really a recurring purchase. You are not buying a sensor once. You are buying into a replacement cycle. And the total cost of that cycle — plus everything you spend keeping the thing alive between purchases — is the number that should drive the decision. Not the sticker.
So let’s build that number.
The Hidden Cost Stack of a “Cheap” Sensor
Say you buy an inexpensive wired sensor to save money up front. Good instinct on paper. Now watch what happens over five years of real production.
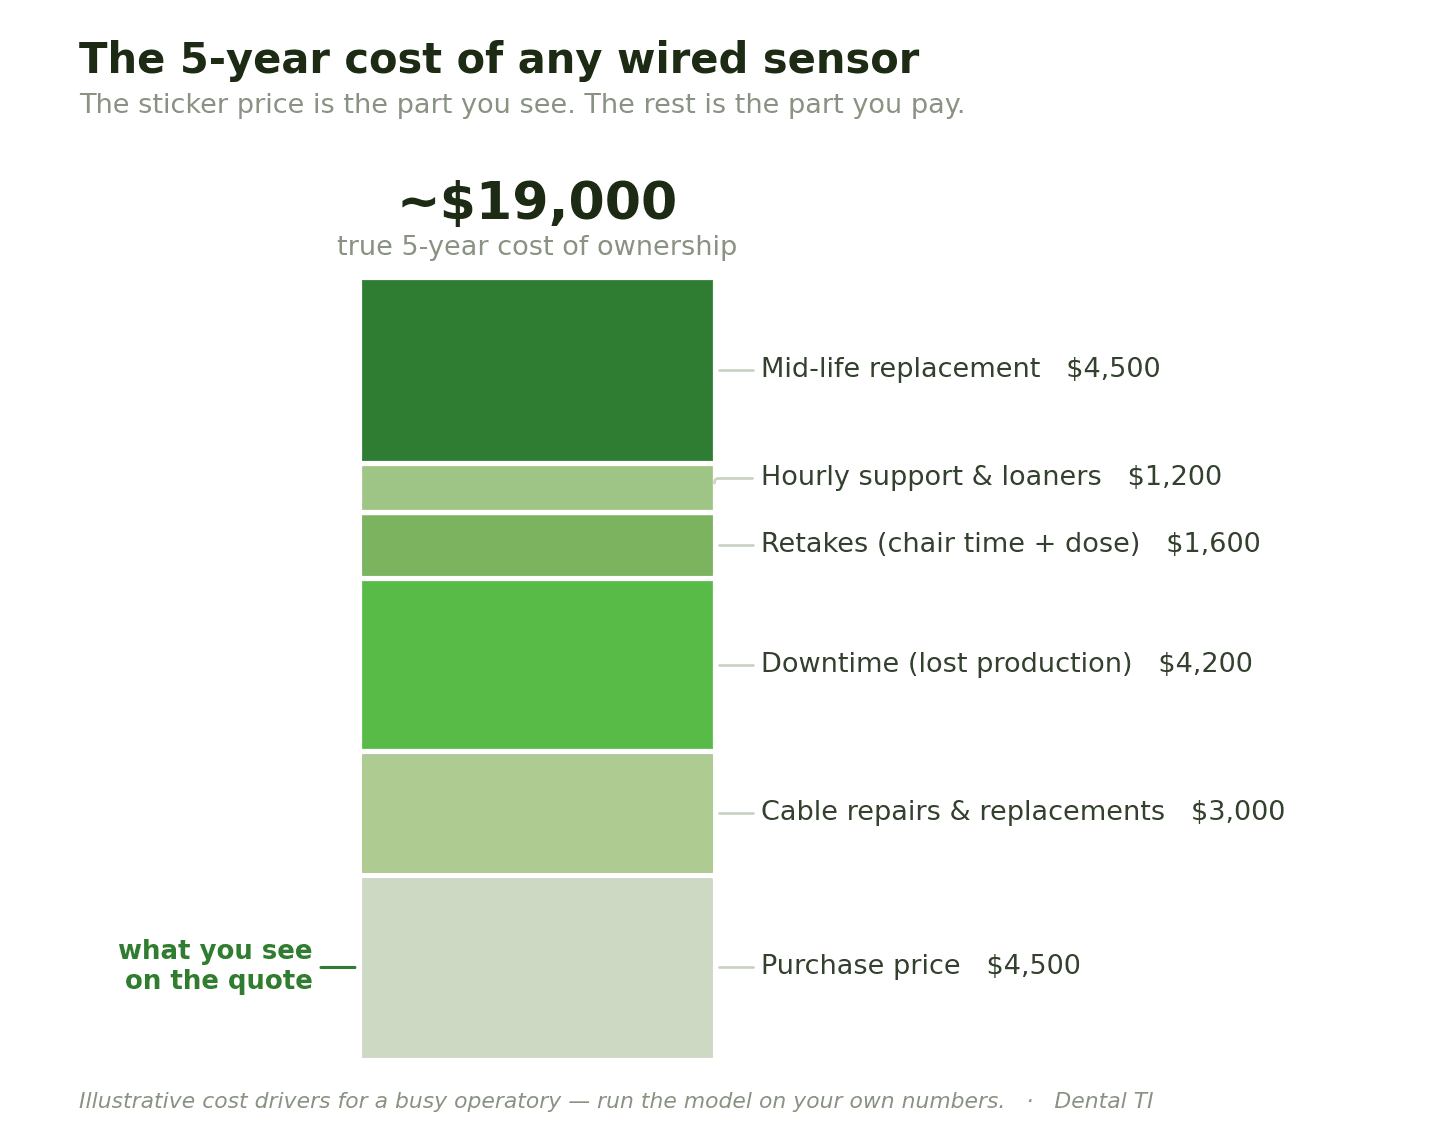
The cable is the failure point. This is the single most important thing to understand about a wired sensor. The most common reason a wired sensor goes down isn’t the detector — it’s the cable. It gets yanked, stepped on, rolled over by a stool, bent one too many times at the strain relief. When it goes, a cable repair or replacement typically runs $1,000 to $2,000 depending on the sensor — and that’s assuming the cable is even serviceable and you’re not buying a whole new unit. Cable repairs aren’t free, they’re not instant, and a sensor that’s out for repair is a sensor that isn’t producing. Over five years, a busy operatory can rack up several of these. That’s a four-figure, recurring line item that simply does not exist on the quote.
Downtime is the expensive part nobody prices. When a sensor is down, the chair doesn’t stop costing you money — it just stops making any. Figure out your production per operatory per hour and multiply it by the hours a down sensor takes out of your schedule across five years. For most practices that number dwarfs the repair invoice. A sensor that’s “cheaper” but down more often is quietly the most expensive tool in the building on the days it fails.
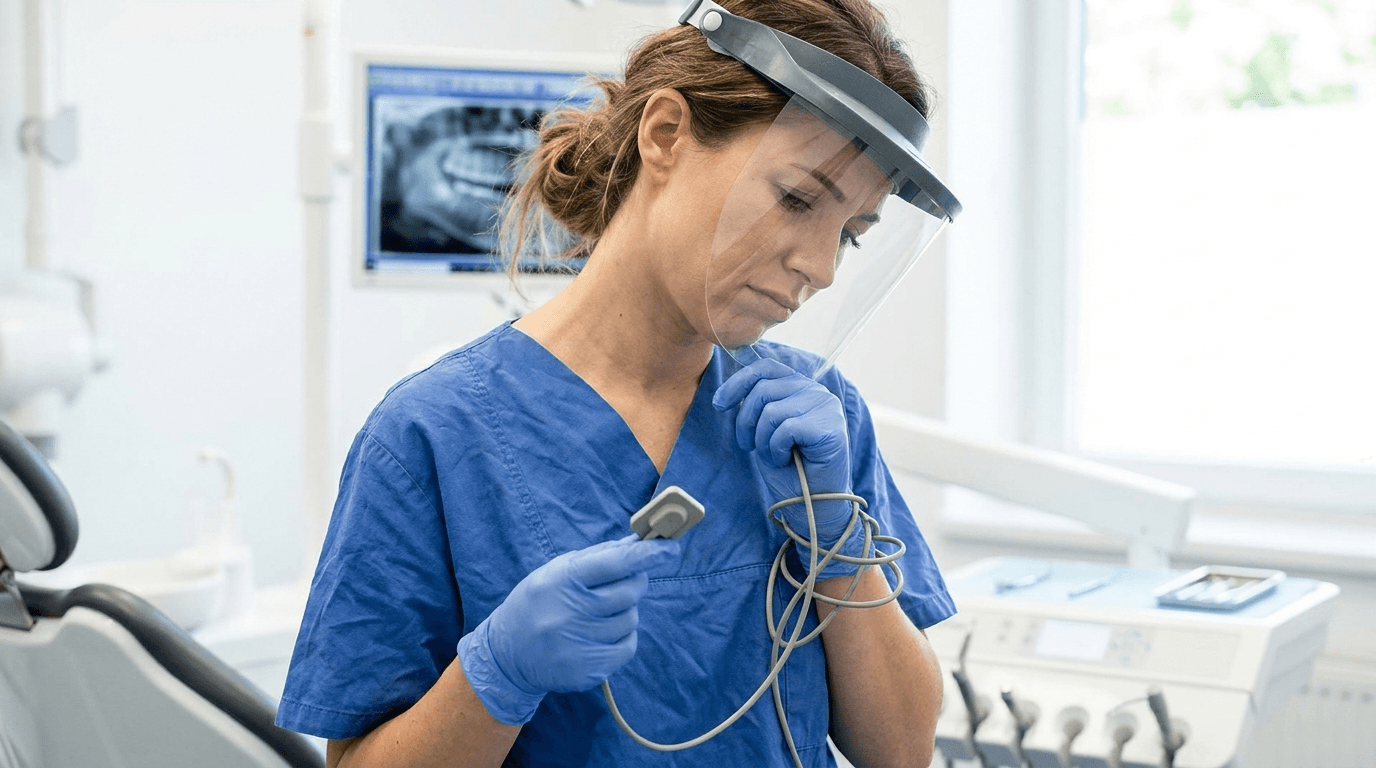
Retakes cost time, dose, and goodwill. A lower-resolution or finicky sensor produces more images you can’t fully trust — so you shoot again. Every retake is another few minutes of chair time, another exposure to the patient, and another small ding to the experience. Multiply a couple of extra retakes a day across five years and you’re looking at real hours and real production, none of it on the invoice.
Support that isn’t included is support you pay for. Hourly support fees, loaner rentals while you wait, shipping a unit back and forth — the “cheap” sensor often comes with the cheap support model too, which means you pay per incident, at the worst possible time.
The cost you can’t invoice: confidence. This is the one that never makes the spreadsheet, and it may be the most expensive of all. Picture the moment: the patient is in the chair, you’ve told them you need an X-ray, and the sensor won’t cooperate. It won’t auto-trigger. It captures and doesn’t return the image. You take it again. Still nothing. Now you’re apologizing, fiddling with a cable, maybe walking them to another operatory — and in that patient’s mind, the practice that’s about to recommend treatment just looked like it couldn’t work its own equipment. Worse, these failures rarely announce themselves cleanly. They show up first as intermittent problems — the occasional missed trigger, the image that doesn’t come back, the capture you have to repeat “just this once” — for weeks or months before the sensor finally dies. Every one of those moments quietly costs you a little schedule, a little staff morale, and a little patient confidence. You can’t put a number on it, but you can absolutely feel it, and it’s real money walking out the door.
And then you buy it again. Around year five, per that service-life reality, you replace it. So the “savings” from the low sticker gets spent a second time, right about when you’d hoped to be done paying.
Stack all of that up — purchase, cable repairs, downtime, retakes, à la carte support, and a mid-life replacement — and the true five-year cost of a budget wired sensor lands far above its sticker. The price you saw was the down payment. The rest arrives one interruption at a time.
What Changes With the DC-Air™
Now run the same five years with a premium wireless direct-conversion sensor like the DC-Air™, and several of those hidden line items either shrink or disappear.
No cable means the number-one failure mode is gone. This is the big one. If the cable is the most common thing that fails on a wired sensor, then removing the cable removes the most common reason you’d ever be paying for a repair or eating downtime. You can’t damage a strain relief that isn’t there. That single design decision quietly deletes the largest, most unpredictable item in the cheap-sensor cost stack.
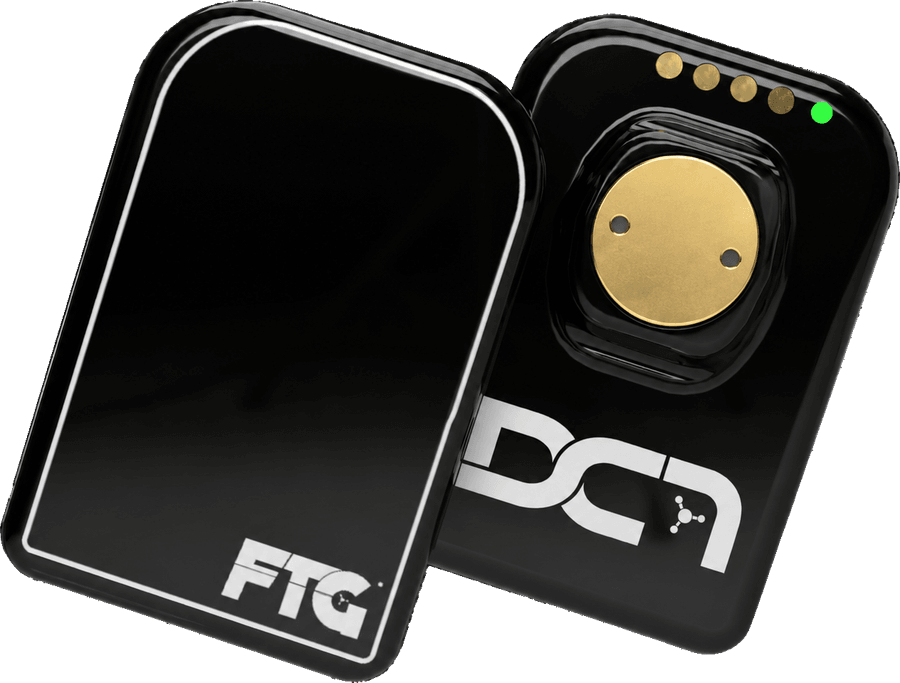
The FTG Protection Plan turns a scary variable into a small fixed cost. Accidents still happen in the best offices — a sensor gets dropped, bitten, or simply walks off. The difference is what that costs you. Pair the Protection Plan with WatchDog™ for $99/month per sensor and a bad day is a predictable, capped line item — an $850 deductible instead of paying full retail for a new sensor — with a free loaner so the operatory never goes dark and unlimited phone support so you’re not paying by the hour. WatchDog™ also means a sensor is far less likely to get lost or quietly thrown away in the first place — it tracks the last-known room for every sensor in the practice — and it logs the KPIs (image volume, quality, and revenue per operatory) that tell you whether your imaging is actually running the way you think it is. You’re not gambling on repair invoices anymore. You’re paying a small, known number and getting the visibility to optimize on top of it.
Fewer retakes, less downtime, more predictable days. A sharper, more reliable capture is a capture you trust the first time. With no cable dragging the sensor out of position, FTG reports up to 40% fewer retakes with the DC-Air™. Fewer retakes means less chair time burned, less dose, and fewer schedule hiccups. Reliability isn’t a soft benefit — it’s money that stays in the schedule.
Yes, the DC-Air™ carries a higher purchase price than a bargain wired sensor. I’m not going to pretend otherwise, and I’m not going to quote you a number in a blog post — call us for current pricing. But that higher sticker is buying down the exact costs that make the cheap sensor so expensive to own. When you carry the two out to five years, the gap at the checkout counter narrows dramatically, and in a lot of practices it flips.
The Line Item That Pays You Back: Diagnostic ROI
Everything above is defense — controlling what you spend. But the most expensive sensor being the best value isn’t only about avoiding costs. It’s about what a genuinely better image earns you. This is the part that never shows up in a cost comparison, and it’s the part that matters most.
Clear, accurate imaging drives case acceptance. Earlier in this series I made the case that a sharp, honest image ends the “watch” — that maddening loop where you see something that might be a problem but can’t quite prove it, so you wait six months and hope. When the image is clear enough to show the patient exactly what you see, the watch becomes a treatment plan today instead of a maybe next year. That’s not a cost saving. That’s production you would otherwise have deferred or lost entirely. One clearly diagnosed and accepted case can cover the entire price difference between a cheap sensor and a premium one.
Better images mean fewer missed diagnoses. A detail you can’t resolve is a diagnosis you can’t make, a treatment you don’t deliver, and — increasingly — a liability you didn’t need to carry. The resolution you pay for isn’t vanity. It’s the difference between catching something at the incipient stage and finding it later, when it’s bigger, costlier for the patient, and harder on you.
Speed and confidence compound. A sensor that captures it right the first time, every time, moves patients through the chair faster and lets your team work with confidence instead of second-guessing a fuzzy read. Across thousands of images a year, small gains in speed and certainty add up to real capacity — capacity you can fill with production.
Put those together and the sensor stops being a cost center. It becomes a piece of equipment that pays for itself out of the production it enables. That is the entire definition of value: not the lowest price, but the best return on the dollar over the life of the tool.
See It to Treat It: The Diagnoses a Sharper Image Unlocks
Let me get specific, because “better image” is easy to say and easy to tune out. Here is what the DC-Air™‘s higher MTF and true resolution actually let you see — and therefore treat — that a softer image quietly buries.
Incisal and occlusal wear. Zoom in and you can make out the small chips and wear facets on incisal edges and occlusal surfaces that tell you a patient is grinding. That’s the evidence that turns “you might want a night guard” into a conversation the patient actually believes — because they can see it too. On a lower-resolution sensor that converts X-rays to light and then sharpens the blur back in software, that fine surface detail washes out.
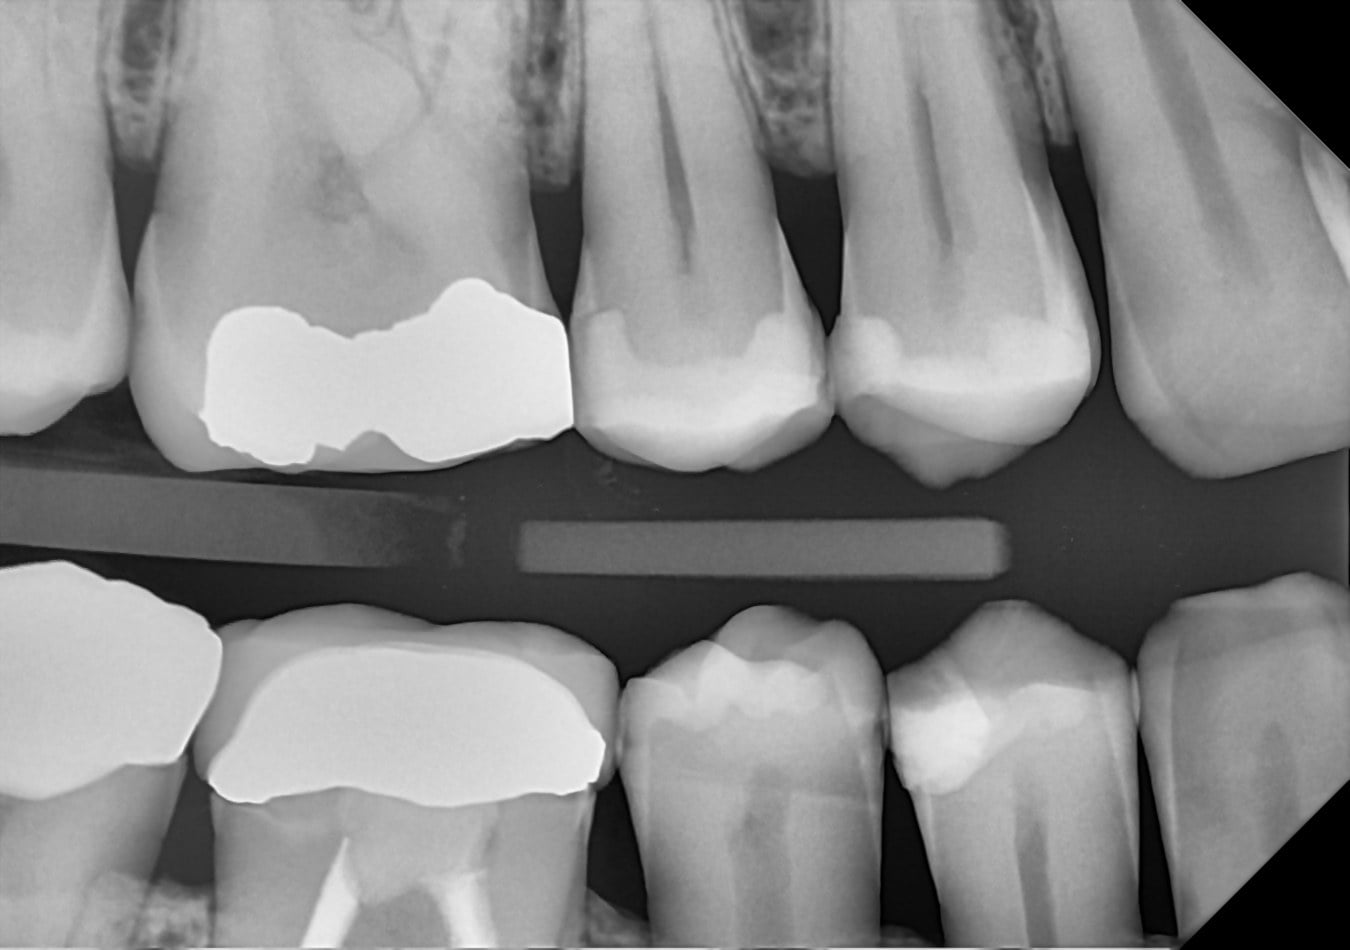
Interproximal caries, early. The DC-Air™ resolves interproximal lesions clearly enough to catch them at the incipient stage — early enough to make a minimally invasive conversation possible, like a remineralization or resin-infiltration protocol such as Curodont, instead of waiting for the lesion to grow into a drill-and-fill. Seeing it early is what makes conservative treatment an option at all.
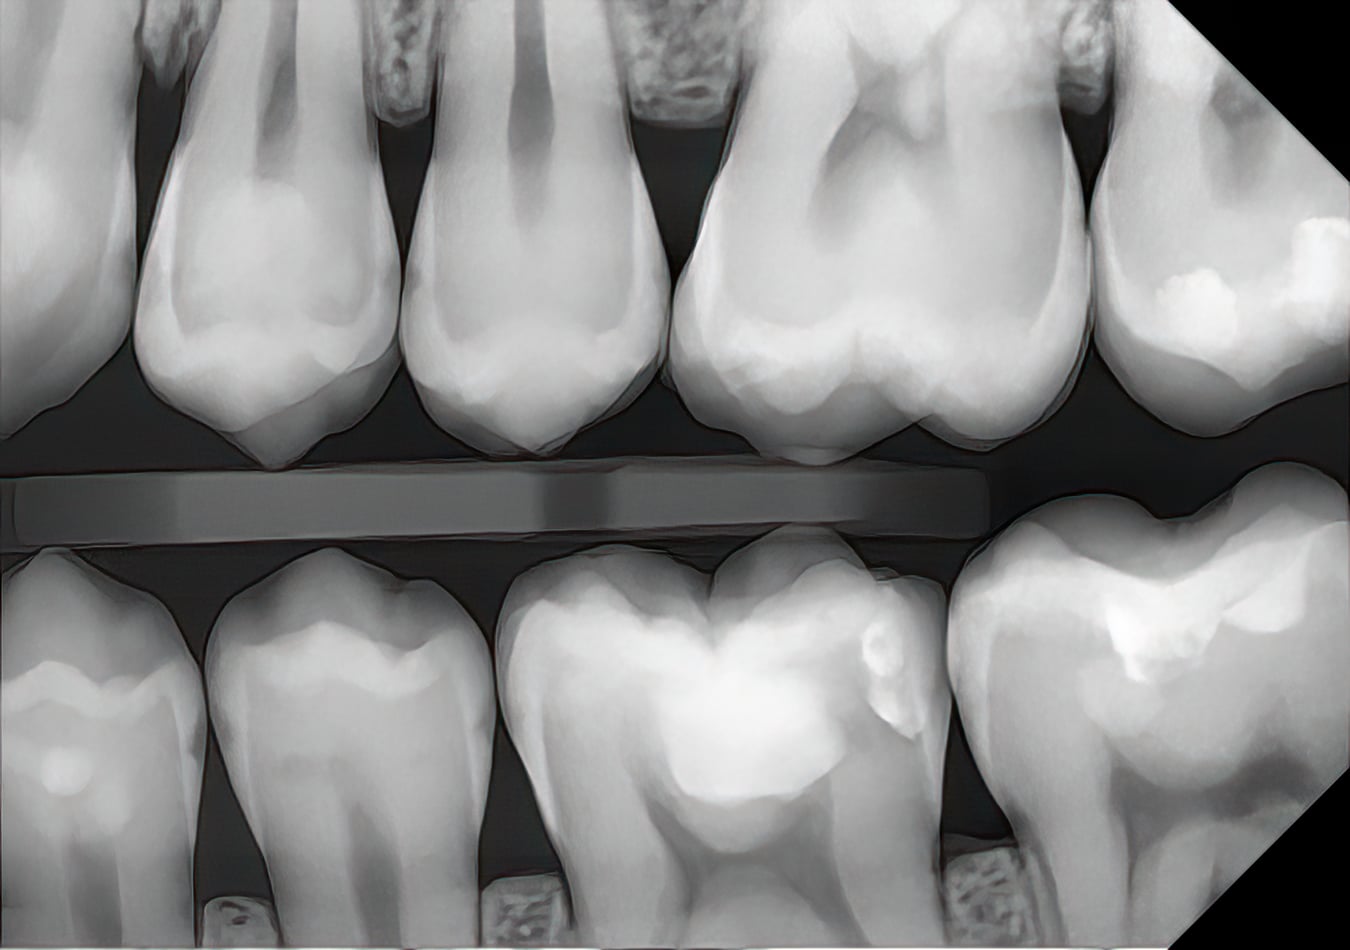
Bone, attachment levels, and pocket depths. Crestal bone height, the periodontal ligament space, furcation involvement — the DC-Air™ renders them with enough clarity to read attachment levels and support a perio diagnosis rather than guess at it.
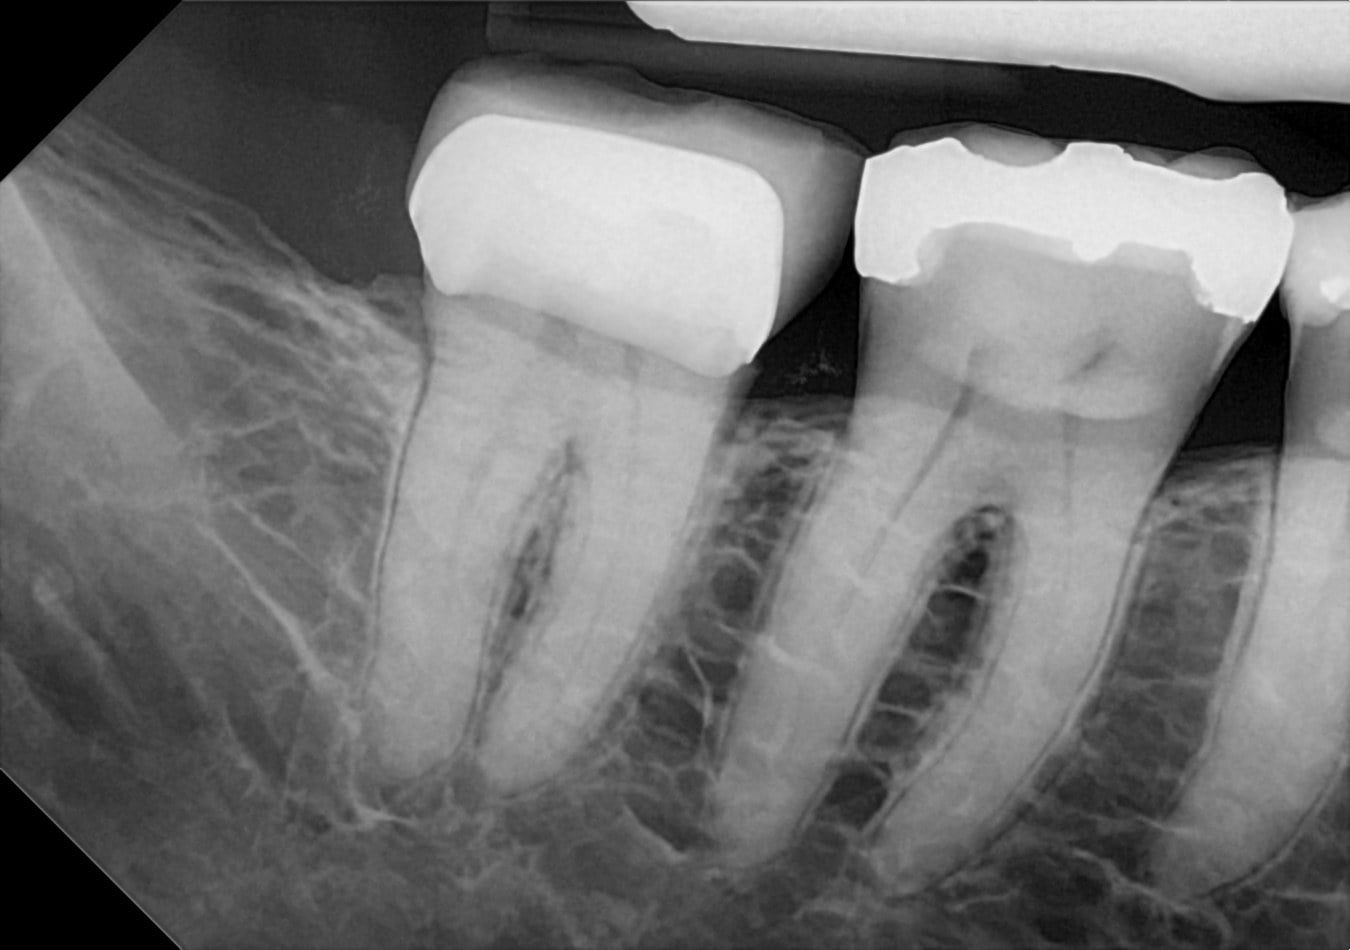
Implant osseointegration and graft material. The same spatial resolution that resolves a root canal fill also resolves the bone-to-implant contact next to it — whether the threads show tight, continuous osseointegration or a gap, and whether grafted bone has matured into the surrounding trabecular pattern or still reads as a distinct, less-organized fill. That’s the detail an implant recall depends on.
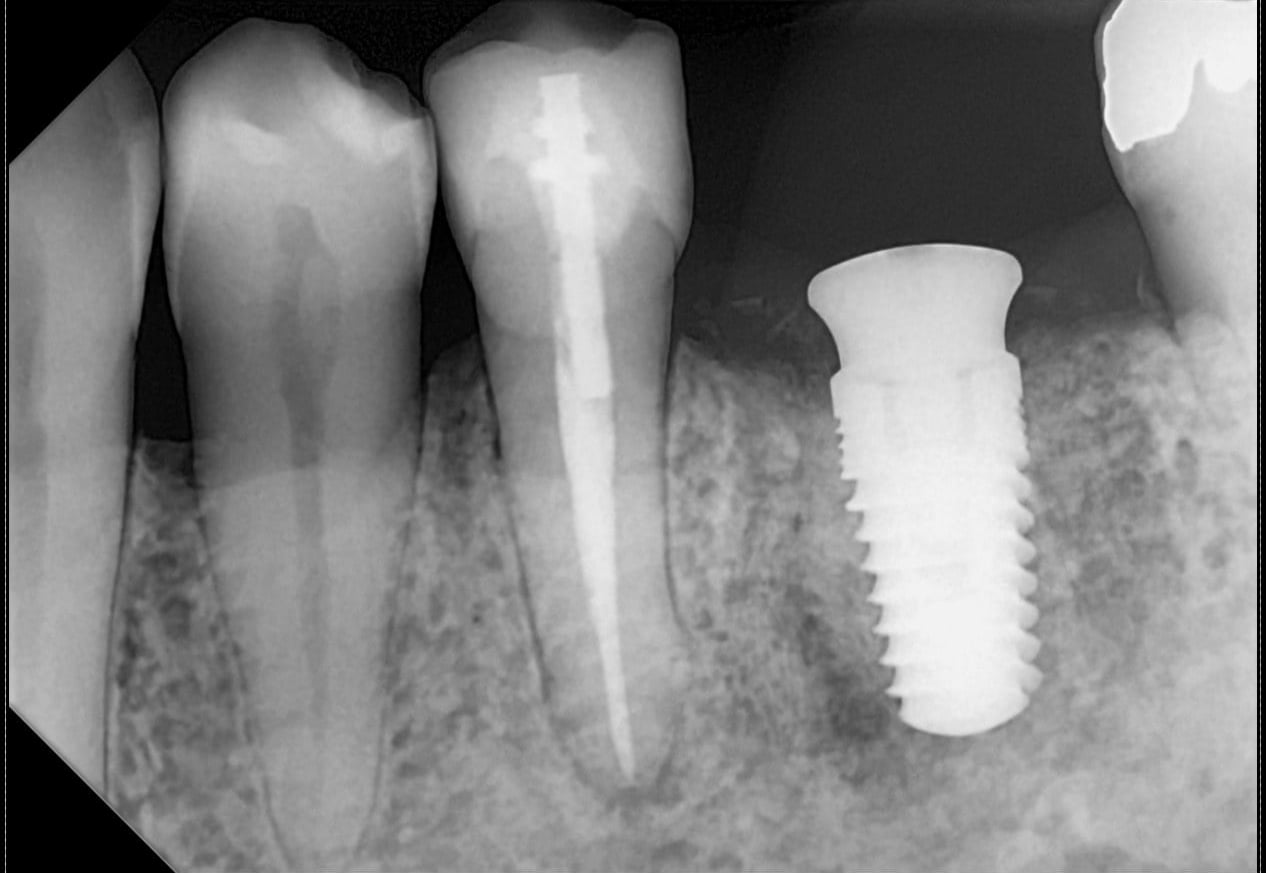
The common thread runs through this whole series: the image isn’t modified. No scintillator, no manufacturer sharpening filter painting detail in or blurring it away — you are reading what the sensor actually captured. FTG’s shorthand for it is “captured, not synthesized,” and the published MTF backs it up: over 70% at 5 line-pairs per millimeter, straight off the detector.
Don’t take my word for any of it — go look. We put 22 clinical DC-Air™ captures in an interactive gallery you can zoom into pixel for pixel, adjust brightness and contrast, and compare against a conventional scintillator image. Pick a bitewing, magnify the interproximal, and judge the detail for yourself. Open the DC-Air™ gallery and zoom in →
A Worked Example: Two Offices, Five Years
Let me put real numbers on it. Two offices, same schedule: four days a week, forty images a day, billed at $35 an image. Over a 48-week working year that’s about 7,680 images each — roughly 38,400 over five years. Each practice runs about $1 million a year in total revenue.
Office A buys a budget wired sensor for $4,000 and carries a $3,000 protection plan over the five years. Office B buys a premium high-resolution sensor for $9,000 and carries a $6,000 protection plan.
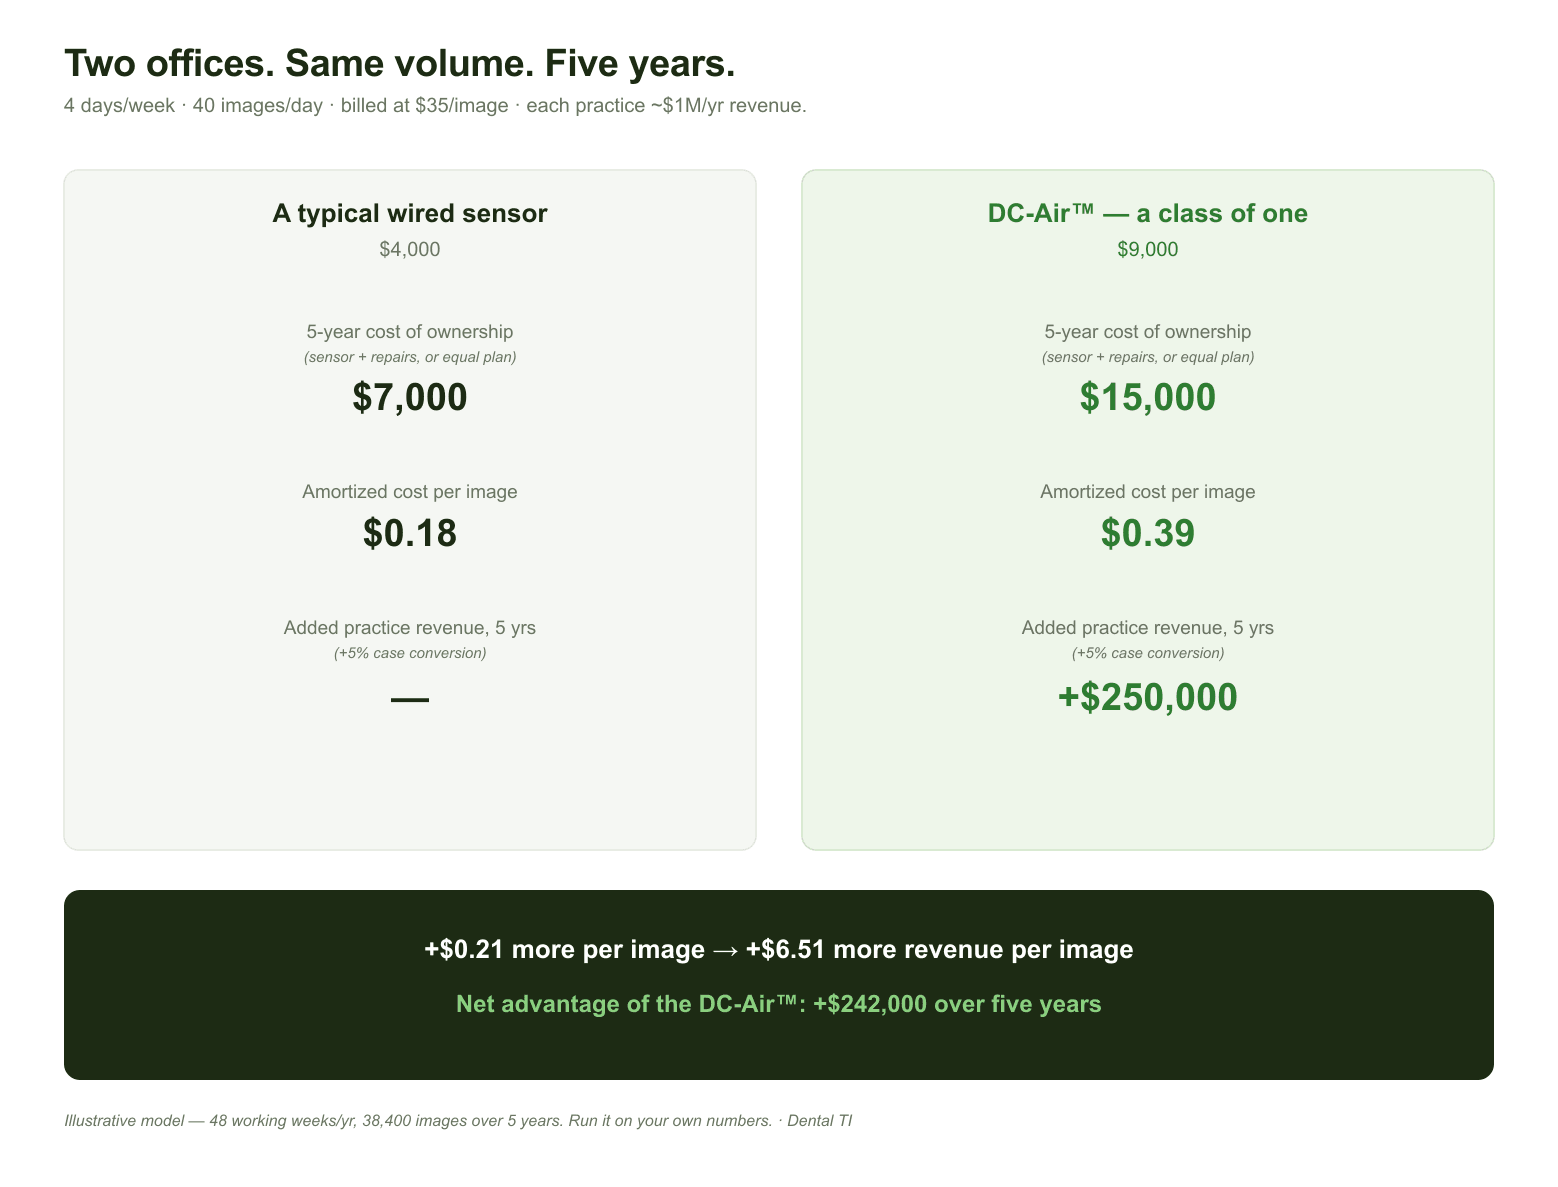
Amortize each sensor plus its plan across those 38,400 images and here’s what you actually pay per X-ray:
| Budget wired ($4,000) | Premium high-res ($9,000) | |
|---|---|---|
| Protection plan (5 yrs) | $3,000 | $6,000 |
| 5-year cost of ownership | $7,000 | $15,000 |
| Images over 5 years | 38,400 | 38,400 |
| Amortized cost per image | $0.18 | $0.39 |
So the premium sensor costs about $0.21 more per image. Twenty-one cents. That’s the entire “penalty” for the better sensor, spread across every radiograph you take.
Now the other side of the ledger. Both offices bill the same $35 per image on the same volume — that part is a wash. The difference is what the clearer image does to the practice. When a high-resolution sensor shows wear, cracks, and interproximal lesions clearly enough that the patient can see them too, more of those findings convert to accepted treatment. Give Office B just a 5% lift in total practice revenue from better case conversion — a conservative number when you’re talking about seeing and diagnosing what a fuzzy sensor hides. On $1 million a year, that’s +$50,000 a year, or +$250,000 over five years.
Put the two sides together:
| Budget | Premium high-res | |
|---|---|---|
| 5-year cost of ownership | $7,000 | $15,000 |
| Extra cost vs. budget | — | +$8,000 |
| Added revenue (5% × $1M × 5 yrs) | — | +$250,000 |
| Net 5-year advantage | — | +$242,000 |
Read those last two rows again. The premium sensor costs $8,000 more to own over five years and returns $250,000 more in production — a net gain of about $242,000. Per image, you spend twenty-one cents more and earn about $6.51 more. That’s roughly a 31-to-1 return on the “expensive” choice.
That is the whole argument in one line: the cheap sensor wins the quote and loses the five years. The expensive sensor loses the quote and wins by a quarter of a million dollars.
How to Actually Run the Numbers
The example above uses round, conservative assumptions — swap in your own. Run the numbers yourself in our 5-year cost of ownership calculator → Or work through the framework here:
Start with the purchase price of each option. Add your realistic repair and cable-replacement costs over five years — ask the brand how they handle cable failures, because that’s where wired sensors break. Add a downtime cost: your production per operatory per hour times the hours you’d lose to failures and repairs. Add retakes: extra chair time and exposures times your volume. Add support and loaner costs if they aren’t included. Add a replacement around year five if the service life says you’ll need one. Now you have the real cost side.
Then, on the value side, estimate what better imaging earns: even one or two additional accepted cases a year from clearer diagnosis, plus the time you save on retakes and the confidence you gain. Subtract that from the cost side.
Do that honestly, and the cheap sensor’s total climbs while the premium sensor’s total comes down — and the premium sensor’s value line pulls it ahead. The sticker price told you almost nothing. The five-year number tells you everything.
The Bottom Line
The cheapest sensor can absolutely be the most expensive thing in your operatory — paid for in cable repairs, dark chairs, retakes, hourly support tickets, and a replacement right when you thought you were done. The most expensive sensor can just as easily be the best value you buy — because it removes the failure point, caps the surprises, and, most of all, earns its keep out of the clearer diagnoses and accepted treatment that a truthful image makes possible.
Buy the five-year number, not the sticker. When you do, the math tends to point the same direction.
Right now, that math gets even better: for a limited time this summer, DC-Air™ is available with 12 months at 0% financing combined with a 10% discount — the two offers stacked together, not a choice between them.
Run your own five-year model before you sign anything. If you want, we’ll build it with you — your production numbers, your volume, honest assumptions on both sides — and you can see for yourself where the cheapest sensor really lands.
— David Hanning · Co-founder, FTG Imaging · CEO, Dental Technology Integrators.
Want to see the summer offer applied to your own numbers? Talk to Dental TI about DC-Air™ — bring your production numbers, and ask about the 12-month 0% financing plus 10% discount promotion, current DC-Air™ pricing, and the Protection Plan.